Help Center › Classes & Scheduling
Designing a poster for a seminar
The poster studio turns a seminar or course into artwork for an Instagram post, a story, a landscape banner and an A4 print, filled from the event's own details.
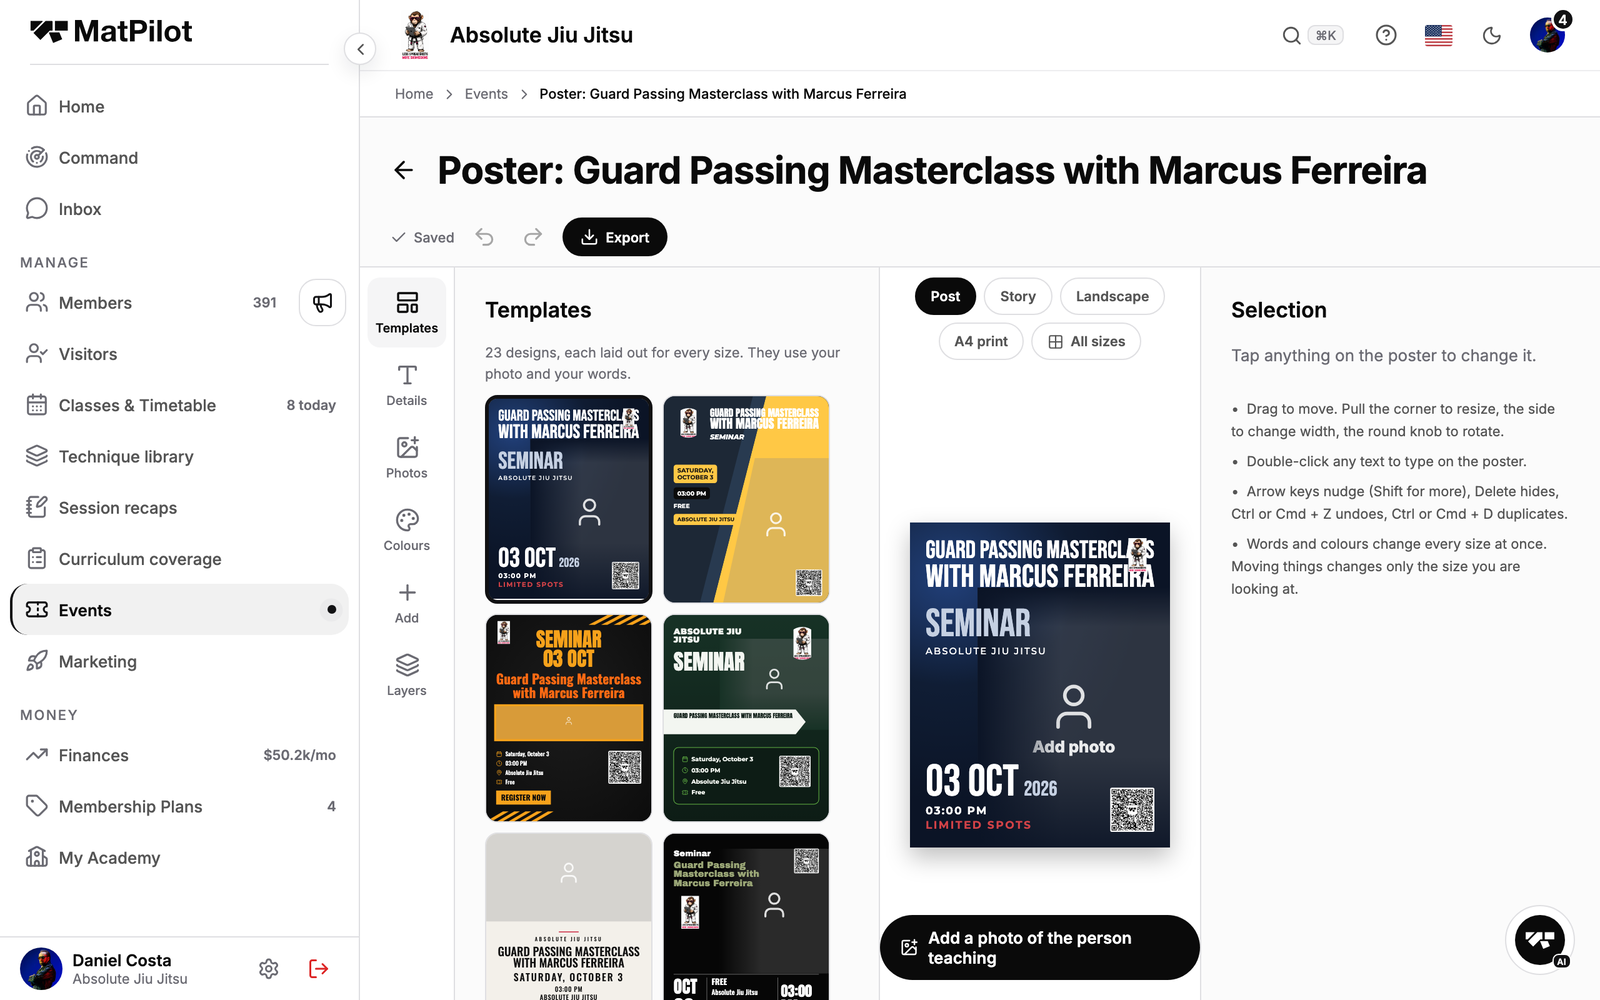
Open the studio
- Go to Events, then Seminars (or Courses), open the event and tap Create a poster.
- The studio opens on the Post size with the first design already filled in: the title and the guest when there is one, the date, time and place, the price, and a QR code that opens the event's page.
Pick a design and a size
- There are 24 designs. Each one is laid out for every size, so pick the design you like and switch between Post, Story, Landscape and A4 print with the tabs. The words stay the same; the layout adapts.
- Moving something on the Story does not move it on the Post. Where a word sits is kept per size, so each one can be tidied on its own.
Change what you like
- Double-click any text to retype it on the poster. Drag to move, pull a corner to resize, the round knob rotates. Arrow keys nudge.
- Photos adds a picture of whoever is teaching. It shows on the poster while it uploads.
- Colours recolours the whole design at once. Layers hides or reorders anything. The QR code can be switched off.
- Undo and redo cover every step (Ctrl or Cmd + Z, add Shift to redo). Ctrl or Cmd + D duplicates a layer.
Export and share
Tap Export and choose the size: a PNG for the socials, a PDF for A4. Your changes save on their own about a second after you stop, so you can come back to the poster later from the same event.